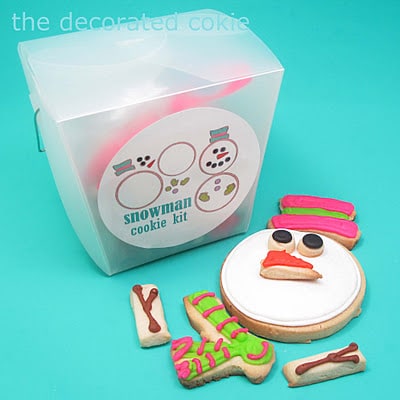
assemble your own snowman cookies
Assemble-your-own-snowman cookies are a great homemade Christmas cookie gift idea. Kids will love putting together their snowman decorated cookies.
This whole assemble-your-own decorated cookie concept is definitely not mine. The list of those more clever that came before me (at least that I’ve witnessed, even going so far as to declare a trend): Jack O’ Lantern piece cookies by Bee in Our Bonnet. Mr. Potato Head cookies by Oh Sugar! Events. Turkey piece cookies from Munchkin Munchies. See what I mean? Some seriously clever folks out there armed with frosting bags.
Snowmen seemed an obvious choice since they have so many bits and pieces.
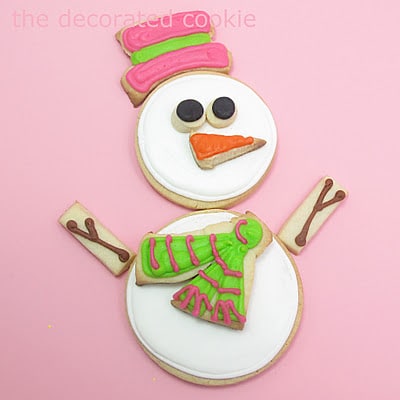 |
| Do you like my hat? |
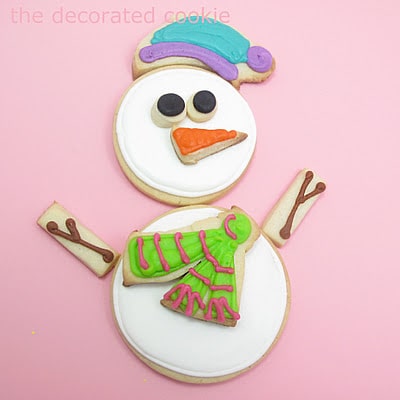 |
| Or is this one more to your liking? |
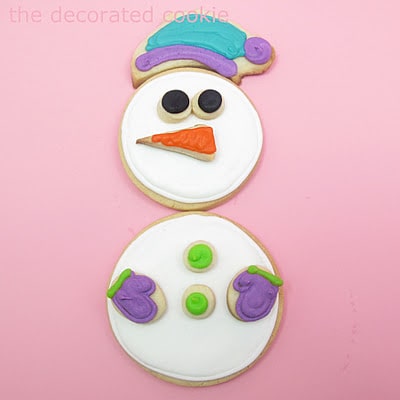 |
| So you prefer mittens and buttons. |
I made these snowman kits for all my nieces and my daughter, five in total. I packaged all the parts in cello bags with ribbon in these little containers, boxed them up, and put them in the freezer.
A few days before Christmas, I’ll remove the box from the freezer and let everything thaw before opening up the box.
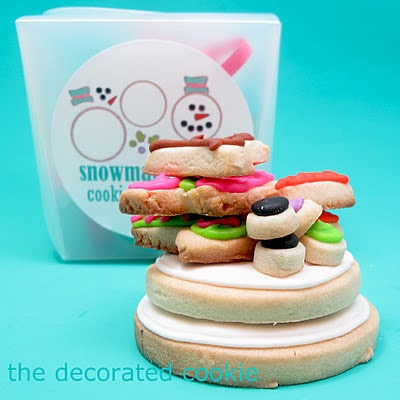
how to make snowman piece kits
you will need:*
cookie dough
royal icing
packaging
For food coloring, I suggest Americolor Soft Gel Pastes (Super Black, Electric Green, Electric Pink, Orange, Chocolate Brown, Turquoise, Electric Purple and Bright White used here).
Find disposable decorating bags, couplers and tips in the craft store. I used tips in sizes 3, 4 and 5. Your best bet for cookie cutters is to buy a set of circles.
For basics of cookie decorating, find a quick tutorial HERE.
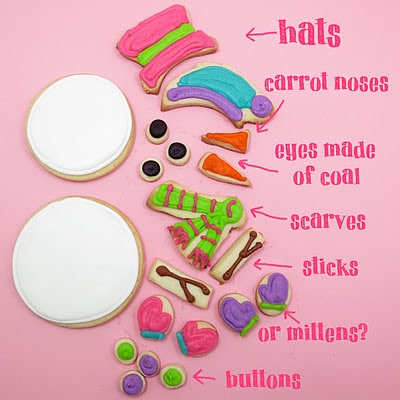
step one: bake your cookies
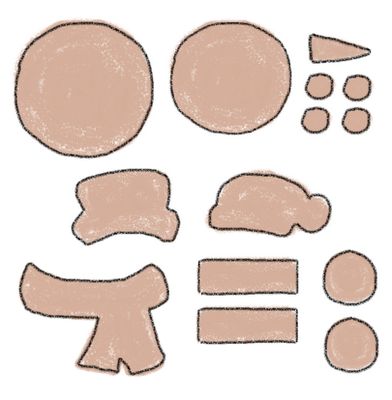
Roll out chilled cookie dough and cut out your pieces. Bake and let cool.
For the snowman head and body, I used 2 1/4 inch and 2 1/2 inch circles (use any size that works for you).
For the noses, I cut out mini triangles by hand. For the buttons and coal, I used a 1/2 inch circle.
For the mittens I used a 1 inch oval, but you can use a 1 inch circle.
Cut out the hats and scarves by hand (tedious, I know, I used the circle cutters I used for the head and body as a guide for sizing).
For the sticks, I used a dough scraper to cut out rectangles 1/4-inch by 1 1/2 inch. If I was Callye, I’d find a way to use manipulate one of the hundreds of cookie cutters I own to make these shapes.
step two: prepare your icing
Prepare royal icing, divide and tint your colors. I used white, black, orange, purple, lime green, pink, brown and turquoise. You’ll need a lot of the white. Prepare decorating bags with couplers and tips (see sizes below), fill with icing and close tightly with rubber bands. Reserve half of the white icing and cover.
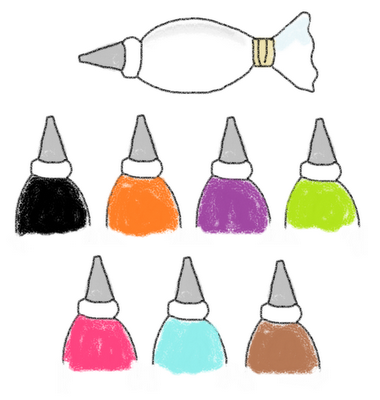
step three: decorate your pieces
For the body and head, outline the cookie with white using a size “4” tip. Let set and flood with thinned, white icing.
For the rest of the pieces, I just piped the icing with the decorating bags and tips. For the carrots, outline and pipe back and forth to fill orange triangles with a “3” tip.
For the coal and buttons, use a “4” or “5” tip to just pipe dots on the little circles. For the hats and scarves, outline the cookies with a “3” tip and fill with desired colors by piping back and forth, using a “4” tip.
I piped stripes on the scarves with a “2” tip. For the mittens, use a “3” tip to pipe a stripe on the bottom of the cookie in any color.
Pipe and fill the mitten in any color, using a “3” or “4” tip. For the sticks, pipe brown sticks with a size “2” or “3” tip.
step four: package your kits
Let the cookies dry well, at least overnight. Then package in cello bags in containers.
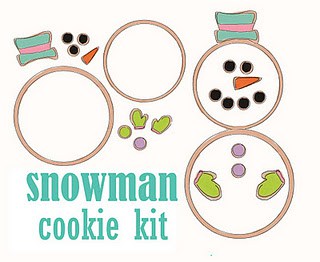
UPDATE: This is the picture I made to use for the labels. Click the image, then right click to save to your computer.
Then insert and resize to fit a template for labels or paper to cut out by hand. (I’m sure already know this, but the image is protected under copyright, so just please don’t use it for profit, only for personal use.)
ANOTHER UPDATE: FREEZING COOKIES:
I mention freezing the cookies and Serena asked about that in the comments. Such a good question, I thought I’d put the answer up here.
Decorated cookies are surprisingly hardy and can survive a lot of hardships, like freezing.
To freeze, let decorated cookies have plenty of time to fully dry, 1 to 2 days. I wrapped mine in cellophane favor bags tied with ribbon to skip a step later, but this is optional.
You can wait until they thaw to wrap prettily.
Place the cookies in a Freezer-safe Ziploc bag, ideally in one, flat layer. Stack and freeze.
o thaw, remove from freezer and let thaw fully in the Ziplocs before removing. Do not open that Ziploc until the cookies thaw fully or cookies will sweat. Allow a couple hours to thaw.
Then they are good as new. Sometimes darker colors can bleed, but that has happened to me rarely.


Sue @ Cakeballs, cookies and more says
that is so cute, I would not play with it though ,I would be nibbling the hats before I could.
Anjali says
Very creative and cute idea!
Rowaida says
Sooo cute I pinned the cookies on pinterest Happy weekend xoRowaida
J+S says
Meaghan, how do you do it? This is so cool and you know I have to share this! Of course I'm linking and crediting back to your genius. I love love love this so much!~Jenifer
Paula says
What a deliciously creative gift idea for the kids and what fun they are going to have putting these together and then eating them all!
Kay Lefort says
Your creativity abounds!! Love, love, love this idea!! Too cute and clever.
warning sugary goodness says
Great job gona make these for the little ones. Thanks for sharing
warning sugary goodness says
Great and love the packaging. Gona give these to the little ones, if I don't eat them first!
Cindys Confections.com says
These are soooo cute!!! Are these going to be in the book??
SweetSugarBelle says
Megs, I love everything about this. The idea, the cookie, the colors, and most of all you!!!
Pink Little Cake says
This is so cuteeeeeeeeeeee! I love this idea! you better copyright it, I can see it soon every where.
Sugartown Sweets says
Super Adorable!! I love it..so inventively CUTE!!
karen says
Super Adorable! I love it…so inventively cute!!
micnmax says
any chance at getting a printable version of you totally cleaver label??
Stacy says
These are too cute!!
Joy Tilliridou says
These are ADORABLE!!! I already have my Christmas Cookie presents set, or I would totally be doing this! Next year!!!
Lissa (Bellenza) says
What an adorable gift idea for little ones in the family!
Sue says
Meaghan, Your snowmen sre SO cute! I love the packaging/label too! Thanks for the link-love too:)
Trish - Sweetology101 says
this just made me smile ear to ear!!
Katrina {In Katrina's Kitchen} says
The mittons are my favorite. 🙂