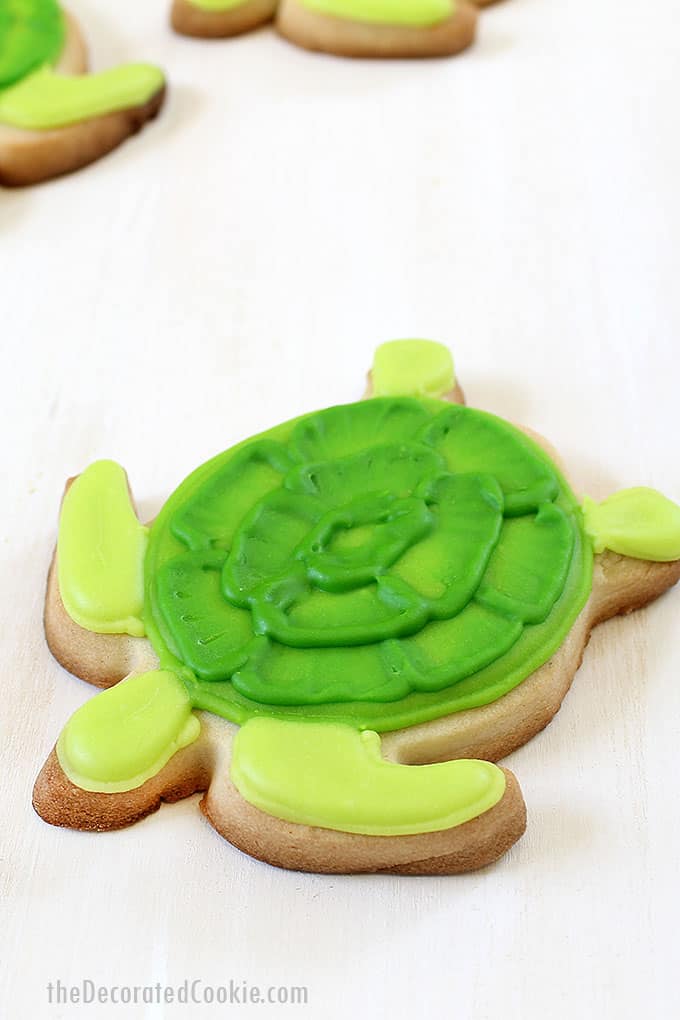
Using a brush embroidery cookie decorating technique to make turtle cookies.
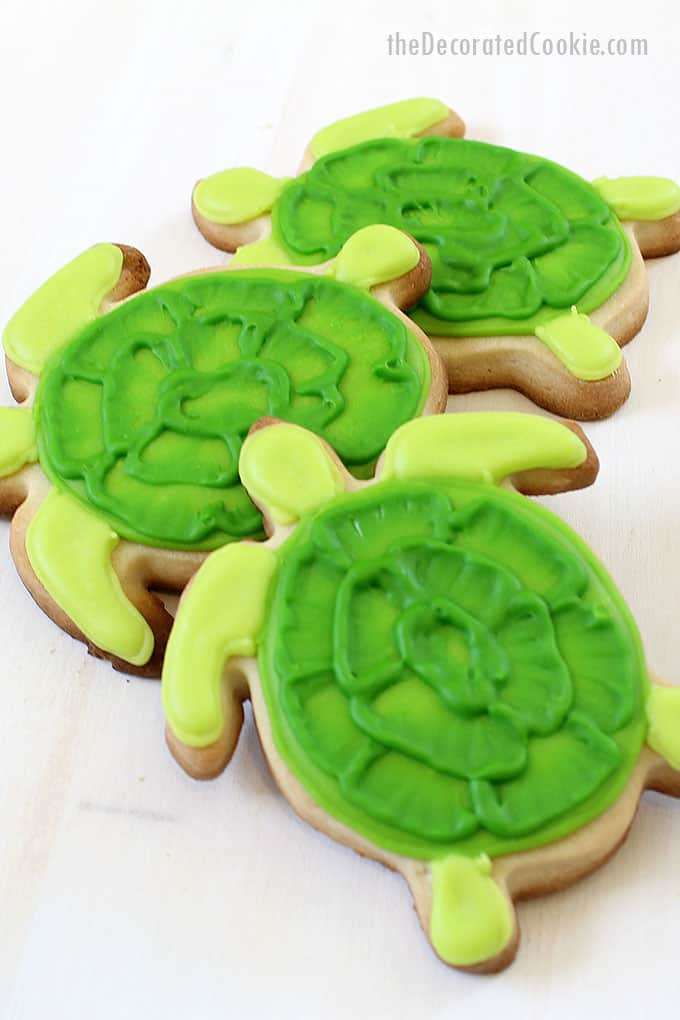
turtle cookies
Turtle cookies might need to make an appearance at your summer parties. (Or swamp parties?)
I’ve been wanting to try the brush embroidery cookie decorating technique for years now, and given the title of my blog, it’s shameful I’ve not yet.
These turtle cookies were inspired by a Lily Pulitzer pillow at Garnet Hill. To echo my own words about this pillow for my roundup of throw pillow ideas at Houzz (see all 20 pillows here), everything about this pillow is my grandmother.
She grew up on the Jersey shore, so she was no stranger to beach-themed decor, but always in the most subtle, clever and tasteful way. An early-Lilly addict, she’d have loved this print. That and the piping on the border, shape of the pillow and colors are so reflective of her house when I was a kid. Sigh. But I digress…
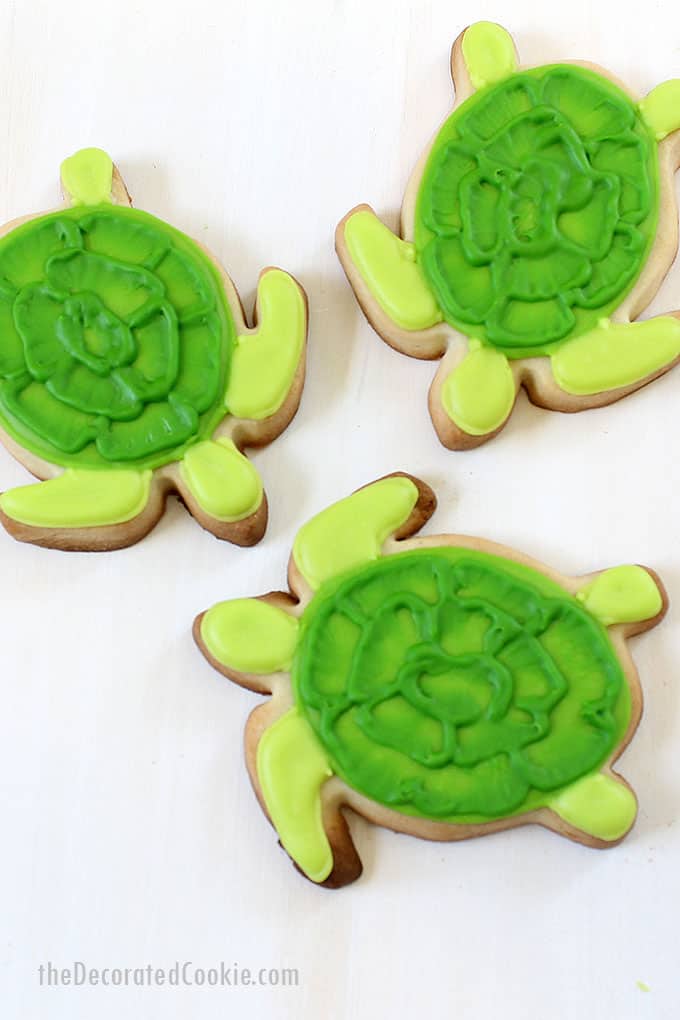
more turtles!
By the way, if turtles are your jam, find how-tos to make a turtle from a seashell here, or make turtle candy pops here.
turtle decorated cookies
For the turtles, I think these would’ve made a greater impact had I had the detail on top be an even darker shade of green, but alas, next time. For a much more apparent contrast, use white instead of green:
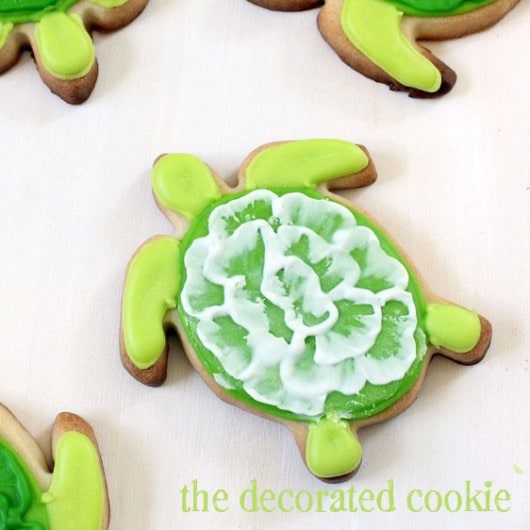
how to decorate cookies
For basic cookie decorating instructions, click here.
You may also take my 6-video cookie decorating course at The Sugar Academy.
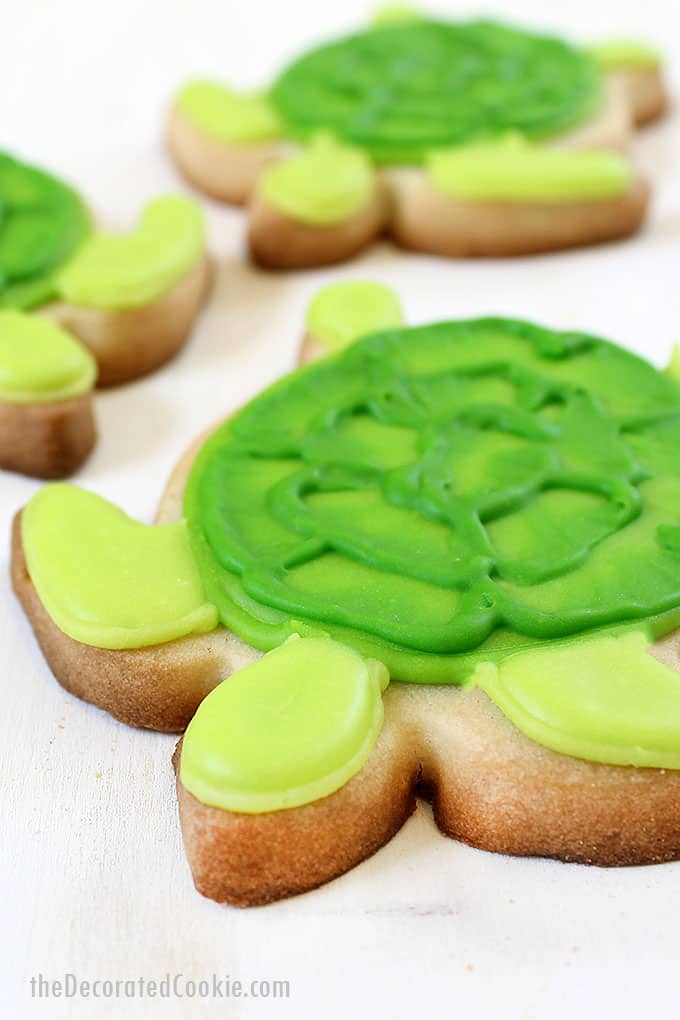
How to make brush embroidery turtle cookies
you will need:*
- cookie dough
- royal icing
- turtle cookie cutter
- green food coloring
- 5 disposable decorating bags
- 3 couplers
- 3 decorating tips, size “3”
- rubber bands
- scissors
- toothpicks
- small, clean, flat paint brush (squared bristles)
*For food coloring, I prefer Americolor Soft Gel Pastes (Electric Green used here). You may find the cookie cutter in the craft store seasonally. Or click HERE for tips on finding cookie cutters. Find the decorating bags, couplers, tips and paint brush in the craft store.
step one: bake your cookies
Prepare cookie dough according to the recipe, chill, roll out, cut out turtles and bake according to the recipe. Let cool completely.
step two: prepare your icing
Prepare royal icing according to the recipe. Divide and tint (I usually work with about 1 cup at a time) three shades of lime green.
Just use one or two drops for light, more drops for medium, many more for dark.
Prepare three decorating bags with couplers and tips, fill with each of the three colors (reserving half of the light green and the medium green) and close tightly with a rubber band.
step three: decorate the background
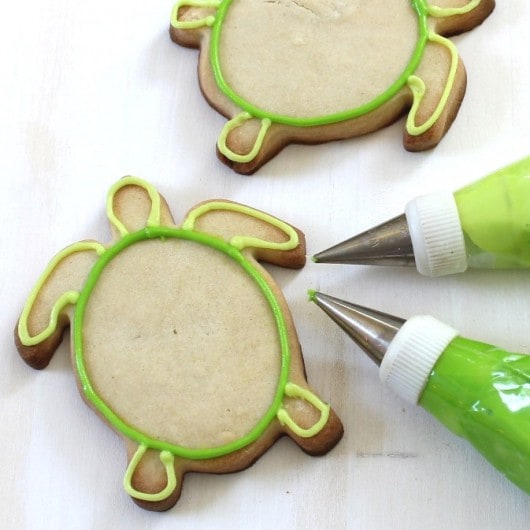
Pipe a circle for the shell with the medium green and let set. Pipe the head, feet and tail with the light green and let set.
Thin both the medium and light greens with water, a few drops at a time, until the consistency of thick glue.
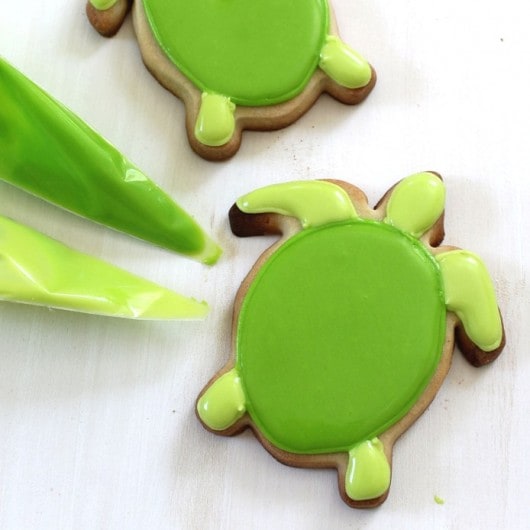
Fill empty decorating bags with each of the greens, snip about 1/2-inch from the tip and pipe to fill the shell with the medium green and the head, feet and tail with the lighter green, using a toothpick to encourage the icing as needed until the entire background is filled. Let set overnight.
step four: brush on the design
When the cookies have set well, pipe the design with the darkest green. First, pipe this sort of rectangular petal shape. Then dip your paintbrush in water, dab on a paper towel and brush from the icing inward in little strokes.
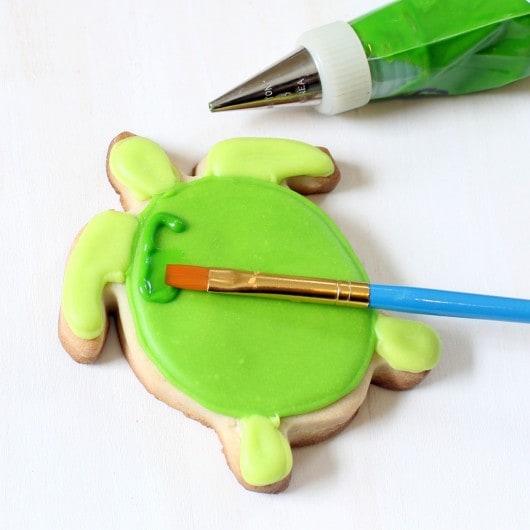
Repeat all the way around the outside of the shell, dipping your brush in water and dabbing on a paper towel as needed.
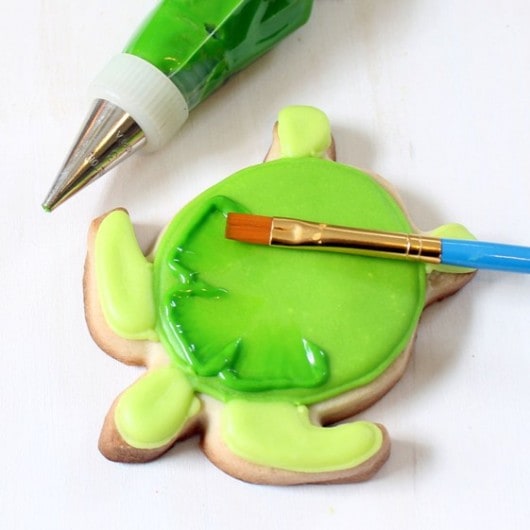
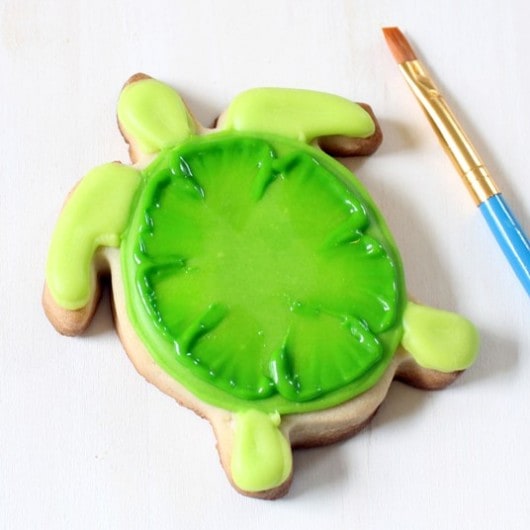
Then repeat with an inner circle:
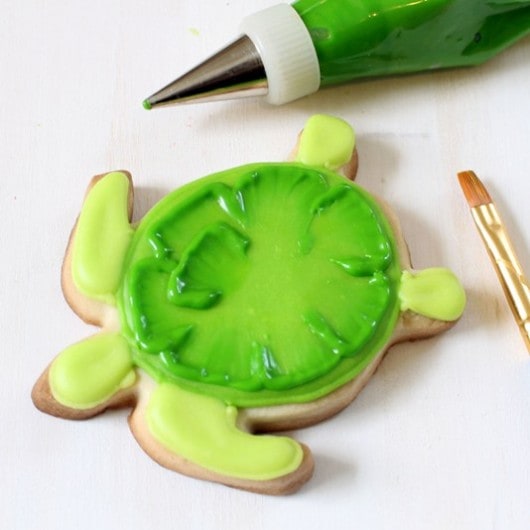
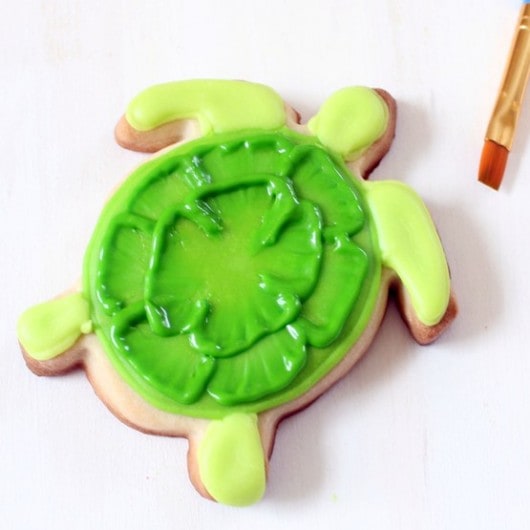
Then one more little rectangle in the center:
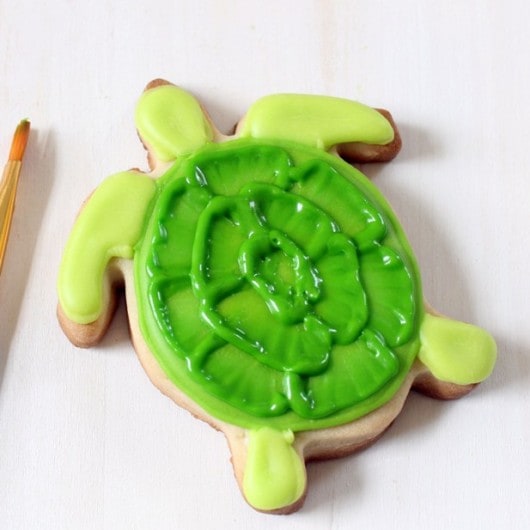
Let dry well, preferably overnight, before handling and packaging.
This post for turtle decorated cookies was originally published in April 2012 and updated in June 2020.


Tammie says
love the turtle cookies. hope i win so i can try them at home . u did a great job.
Isa says
I love it! It´s a fantastic tutorial!
thank you from Spain.
Angelica says
I would like to participate. Thank you!
they are lovely cookies.
Rebecca Bell says
These would be great to make for a weekend beach trip! I’ve yet to attempt the brush embroidery, maybe if I win it will give me the extra push to do it 🙂
Julie Haan says
Wow! What a great idea using the brush embroidery technique on a turtle shell! Thanks for the giveaway!
Bettie says
These are precious. What a fun giveaway! Thanks for the opportunity!
Pilar says
Please, enter me. I love the turtles.
Hugs
Lori H says
I love embroidery! Just never thought I could do on a cookie!! I love it!
mamaowl says
WOW! What an idea! You are sure very skillful, and I would like to try how I can do this!
Shannon A says
I love cookies! Thanks, mamatkins@hotmail.com
Kesha says
I love the turtles! They are too cute! Thank you for the giveaway.
Susie VS says
Who would have thought to use brushed embroidery on a turtle! Love it! Such a great idea!
Kachi says
Green is my favourite color! The turtles are so cute!
Mily says
What a great idea!! the cookies are beautiful..
Miss Overballe says
I looove the turtle cookies!!!
Jamie Poloncak says
These are adorable! My daughter loves turtles so these would be fun to make…fingers crossed!
Martha T says
These cookies are adorable. I have never thought about doing brush embroidery on cookies, but I plan to try it in the near future. Thanks for sharing!
Donna says
Absolutely adorable! My granddaughter loves going to the zoo and especially loves the turtles! Why? Because they don’t move away so fast and make loud noises! lol! She’s a mess! 🙂 Anyway, I am definitely going to order this cookie cutter if I don’t win because she would love this! Too cute! Thanks for the contest AND tutorial!
joanna says
Loove it! pick me!
Karen Brennan says
What a great technique, and an awesome giveaway!!