cherry blossom cookies
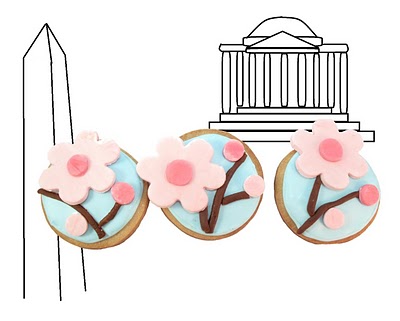
Here in Washington DC, the millisecond the cherry blossoms bloom around the Tidal Basin is big big big.
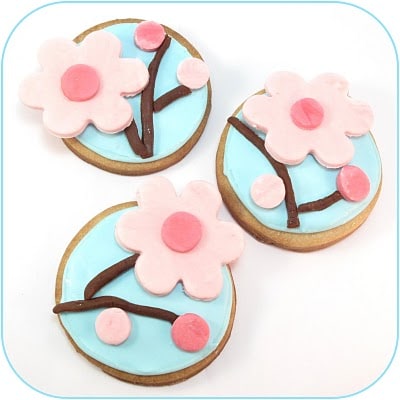
So to honor their upcoming arrival (and hasty departure, it always seems), I used my marshmallow fondant to make cherry blossom cookies.
I had lots of ideas for these, including pulling out my food coloring and paint brush and making them super-realistic looking. But that seemed super-time consuming. So I went the super-easy route instead.
to make cherry blossom cookies
you will need:
cut out cookie dough
royal icing
round or square cookie cutter
fondant (store-bought or homemade marshmallow fondant )
blue, pink and brown food coloring (I use Americolor soft gel pastes food coloring, “Sky Blue,” “Electric Pink” and “Chocolate Brown”)
1 disposable decorating bag
1 coupler
1 size “4” decorating tip
wax paper
rolling pin
small flower cookie cutter
small 1/2 inch circle fondant cutter
light corn syrup
*For tips on finding cookie decorating supplies, click here.
step one: bake your cookies
Bake cookies using the round or square cookie cutter and let cool completely.
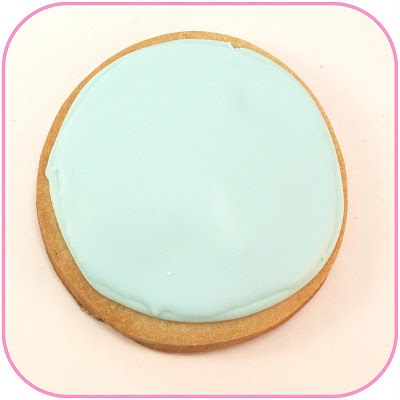
step two: flood your cookie backgrounds
Prepare about a cup of light blue frosting. Use half of it to fill a frosting bag fitted with a coupler and size “4” decorating tip. Tie the bag tightly with a rubber band. Outline circles or squares on the cookies and let set about 15 minutes. Thin remaining frosting with water, a drop or two at a time, stirring well, until the consistency of thick glue. Using a spoon or squeeze bottle, pour some frosting in the center of the cookies and let spread to the edges. You should have to encourage the spreading a bit with the back of the spoon. Let sell well, at least a couple hours or even overnight.
step three: make your cherry blossoms
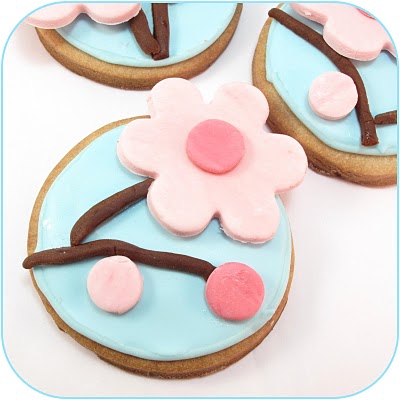
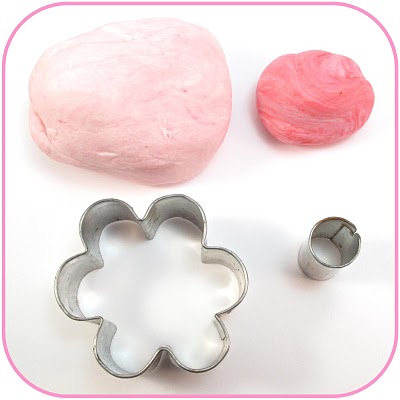
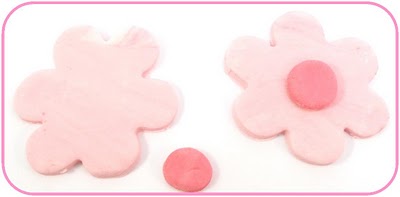
Take a wad of fondant (I use about an egg-size, but adjust depending on how many cookies you are making.) Tint the fondant light pink by adding a couple drops of food coloring and kneading very well. If fondant gets too sticky, let sit uncovered at room temperature about 15 minutes or until easily pliable. Take another wad of fondant and tint a darker pink. Roll each pink fondant about 1/8-1/4 inch thick between two pieces of wax paper. Cut out small flowers with the light pink and some mini circles of both light and dark pink. Dab corn syrup on the back of a mini circle and press onto the center of a flower. Set aside on wax paper.
step four: make your branches
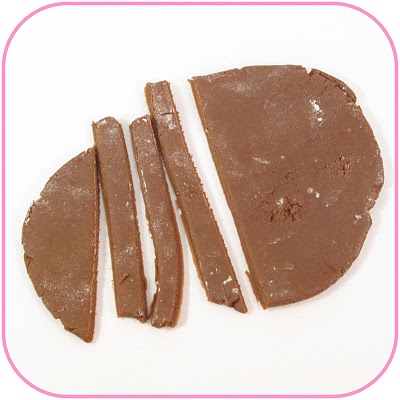
When your cookies are dried and your blossoms are done, tint a wad of fondant with brown frosting. You may need quite a few drops to get a dark brown. Roll thinly between two pieces of wax paper and cut out thin slices. With your fingers, roll the slices a little so they are more log like than flat.
step five: assemble your cookies
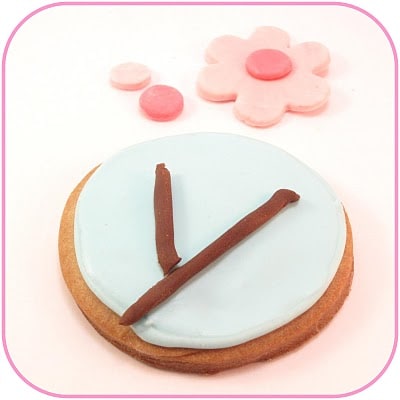
Arrange your blossoms as desired on the cookies. Dab light corn syrup on the fondant pieces to get them to stick. Arrange branches first, then place a flower and a couple mini circles on the branches. (I had you prepare the branches right before assembly so the fondant is still soft. That way, you can bend and manipulate them as you like.)
need more cherry blossom food ideas?
Try these cherry blossom meringues. Or these cherry blossom marshmallows. You can also try painting cherry blossoms on cookies.

Tangled Noodle says
These are so lovely! I just saw these today on Food News Journal (www.foodnewsjournal.com) as the FNJ Daily Recipe! They certainly put me in a spring mood. 😎
Chic Cookies says
oooh, thanks Tangled Noodle! I knew that was posting soon, so thanks for the head's up! I'll head over there now…
Sandy says
I love the autumn best and am so excited that it's finally arrived where I am, but you've got me wishing it was spring now! The tulips sound beautiful. Your cookies are such perfectly pretty creations – I can almost smell the blossom. The display's fantastic too.