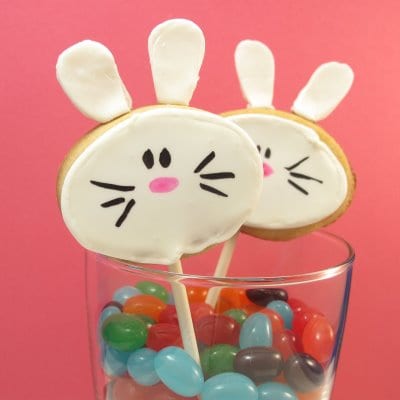
How to decorate bunny cookie pops for Easter.
Once again, I feel somewhat morbid putting animal heads on sticks, but once again, this is the lollipop phase I’m in, so forgive the morbidity.
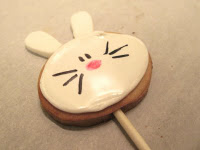
In anticipation of Easter (or just springtime for those who don’t celebrate Easter), here are some bunny cookie pops.
These would be great arranged in a glass vase full of jelly beans. Oh, and note that you must let these dry at least one night, so it’s best to make them a day or two ahead of when you need them.
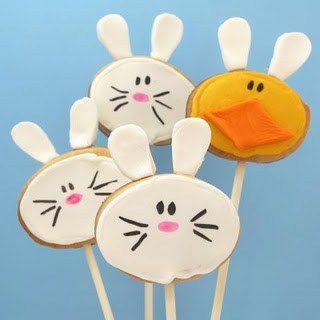
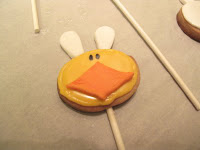
heeeeeyyy, what’s that chick doing there?
how to make bunny cookie pops
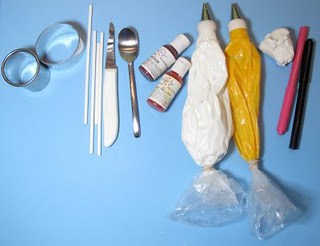
for both bunnies and chicks, you will need:
cut out cookie dough
royal icing
oval or circle cookie cutters (I used 2 1/2″ ovals)
lollipop sticks
parchment and wax paper
2 frosting bags, couplers and rubber bands
2 size “4” tips
frosting colors (I use Americolor soft gel pastes, Bright Orange, Egg Yellow and Bright White) white rolled fondant
light corn syrup
sharp knife
small spoon or squeeze bottle
small knife or spatula
Americolor gourmet writers (pink and black)
If you only make the bunnies, you can omit 1 frosting bag, coupler, rubberband and tip, and the orange and yellow color.
Most of the above is available at major craft stores. You can probably find frosting color and gourmet writers at craft stores, too, but I so prefer Americolor products, available at specialty stores and online.
Find tips on finding cookie decorating supplies here.
step one: bake your cookies
Roll out chilled dough about 1/4 inch, and cut out your circles or ovals.
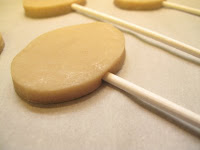
Place on a parchment paper-lined baking tray and insert stick half way. Bake according to recipe (make sure sticks don’t touch each other or other cookies). Let cool.
FOR BUNNIES
step two: flood the cookie
Mix about 1 cup of frosting with bright white color.
Prepare a frosting bag with a size 4 tip and fill with about 1/2 of the white frosting.
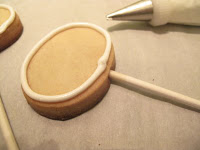
Tie tightly with a rubber band. Pipe a circle or oval outline on the cookie.
Let set about 15 minutes.
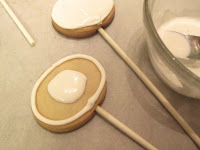
Thin the remaining white frosting with water, 1/4 teaspoon at a time, until the consistency of glue. With a small spoon or squeeze bottle, pour a bit in the middle of the cookie. Spread to edges with small knife or spatula.
Let set very well, at least a couple hours, overnight preferred. (Meanwhile, you can make and add the ears in step three.)
step three: add the ears
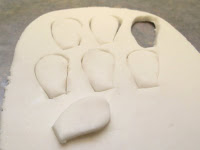
Briefly knead a palmful of fondant in a ball and roll out about 1/8″ thick between two pieces of wax paper.
With a sharp knife, cut out bunny ears (see template). You may want to hold the cookie cutter on the fondant to get a sense of how big to cut the ears.
Don’t cut them too huge, as they will be unstable.
Pat the cut edges with your fingers to smooth and place on a piece of wax paper for a couple hours to dry.
If the fondant gets too sticky when working with it, let it sit for 15 minutes.
When ears have hardened enough to handle, dip flat end in light corn syrup (I squeeze a bit of syrup on wax paper) and adhere to top of head.
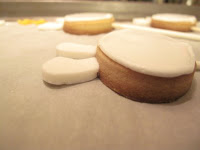
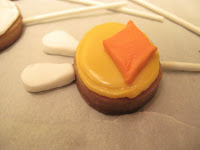
The ears and cookie both lay flat against the wax paper (see picture), so the ears can rest on the wax paper while drying.
Let dry WELL, at least a few hours, overnight preferred. The ears won’t dry rock hard, though they should set, but still use care when handling and wrapping.
step four: make your bunny face
With the pink gourmet writer, draw your nose. With the black gourmet writer, draw the eyes and whiskers or bunny face of your choice.
FOR SILLY CHICKS WEARING BUNNY EARS
step two: flood the cookie
Follow the same instructions for the bunnies but with yellow frosting. Let set well, about 2 hours or overnight. (Meanwhile, you can make and add the bunny ears, but save the beak until yellow dries.)
step three: add the ears
Follow the same instructions above for the bunnies.
step four: add the beak
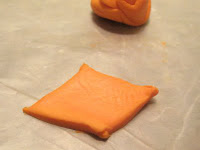
Knead a small amount of fondant with Orange frosting color well. Roll between two pieces of wax paper.
Cut out a diamond shape for a beak (actually more of a rhombus). If fondant gets too sticky to work with, let set about 15 minutes.
Let dry for at least two hours or overnight with the rest of the cookies. When stiff, dab light corn syrup on the bag and press gently onto yellow circle or oval.
step five: make your face
When cookies have dried a couple hours or overnight, draw eyes with the black gourmet writer.


Gina says
OMG. SO CUTE!!
TracyLH says
Oh, I think this idea is just about the cutest thing I have ever seen! You are SO amazingly talented! I got your book and love it! You have such great ideas and the color chart is so very helpful. Thanks for sharing your talent! I think I may play around with your cute bunnies and silly chick as they are just TOO cute! Your talent amazes me!