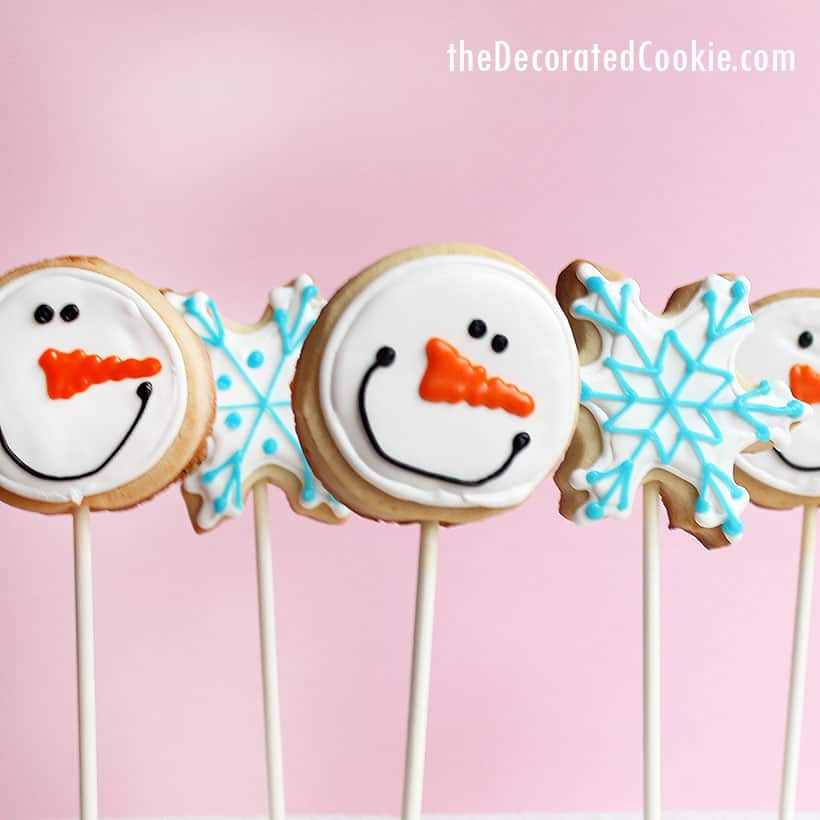
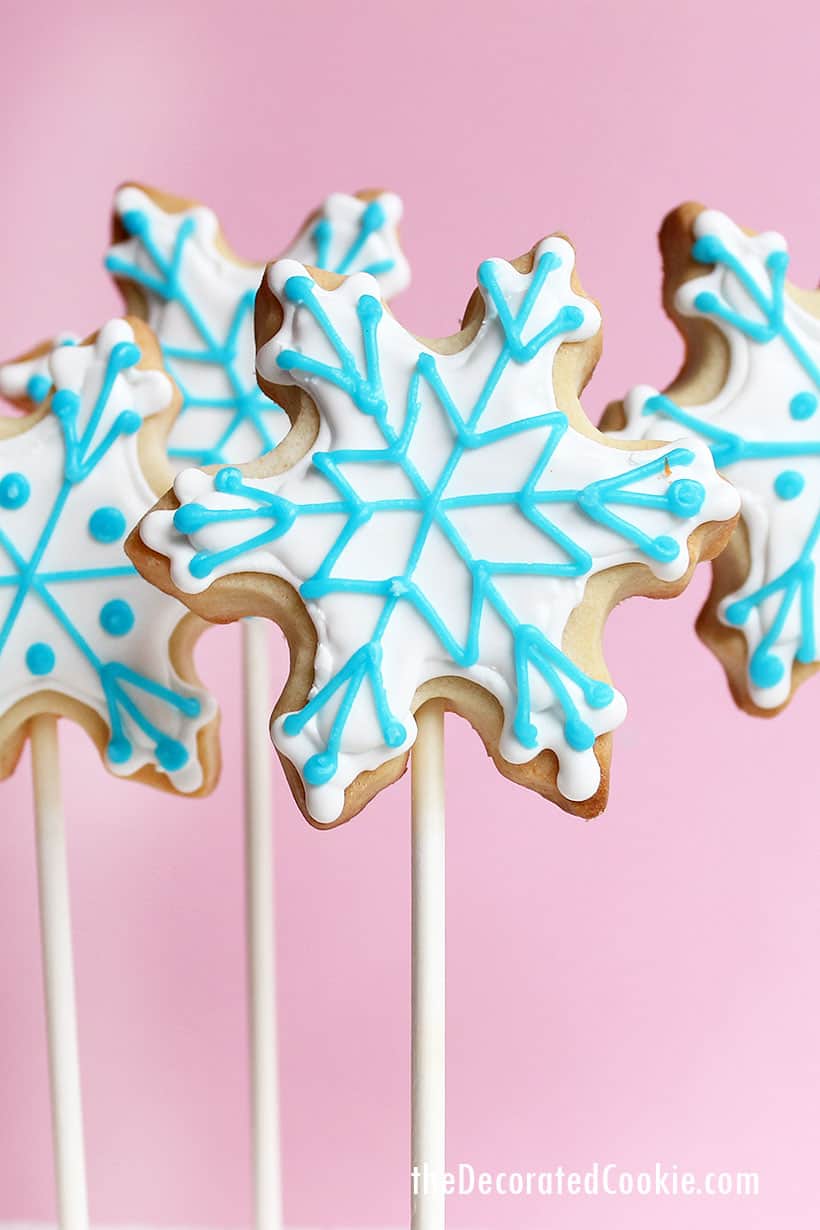
Snowflake and snowman cookies — on or off a stick — are a fun holiday decorated cookie.
This post was originally published in January 2014 and updated in November 2021.
snowflake and snowman cookies — how to decorate winter cookies
I made these snowman and snowflake cookies for my daughter’s school bake sale. Decorated cookies are always a hit!
Have you heard of the Danish term “hygge”? I know exactly what it is, though it’s so difficult to define outside of Denmark. And I’m outside Denmark. And have never even been to Denmark.
But I learned the term from my Danish friend, and it fits so well with that indefinable quality of this time of year.
Despite all the obstacles in my way–such as the stress of hosting lots o’ people in a not-very-big-house, all the cooking and cleaning and more cleaning and I’m-just-giving-up cleaning, the whiny kids, the infuriating and too warm and inconsistent winters of Washington, DC–I seek a sort of “hygge” each winter. I remember the “hygge” of prior winters.
Cookies and hygge go hand and hand.
I went with some non-denominational, simple winter themes, perfect for a school bake sale.
how to make snowman cookies and snowflake cookies on a stick…
These cookies are pretty easy to decorate.
Ingredients you’ll need:
- My cut-out cookie dough (should make about 30 cookies)
- royal icing
Supplies you’ll need:
- 2 1/2-inch circle cookie cutter
- Snowflake cookie cutter
- Disposable decorating bags
- Decorating tips in sizes 2, 3, and 4
- couplers
- rubber bands
- Food coloring
- Lollipop sticks (optional)
For food coloring, I recommend Americolor Soft Gel Pastes in Bright White, Sky Blue, Orange, and Super Black. \
step one: prepare your cookies
Roll out the chilled cookie dough according to the recipe.
I rolled out the chilled dough, cut out 2 1/2-inch circles and snowflakes and made cookie pops. Roll out the dough about 3/8-inch and gently insert a lollipop stick.
After the cookies baked according to the recipe, cool completely..
step two: Prepare your royal icing
Prepare icing according to the recipe and divide. You’ll need the most of white icing. Also prepare blue, black, and orange icing.
step three: Decorate your cookies
Assemble a decorating bag with coupler and size 3 tip, fill with icing tinted white, and pipe to outline the cookies. Let set a few minutes.
Thin icing with drops of water until the lines disappear when you overturn a spoonful. Fill an empty decorating bag, snip the tip, and pipe to fill the cookies. Let icing set 30 minutes.
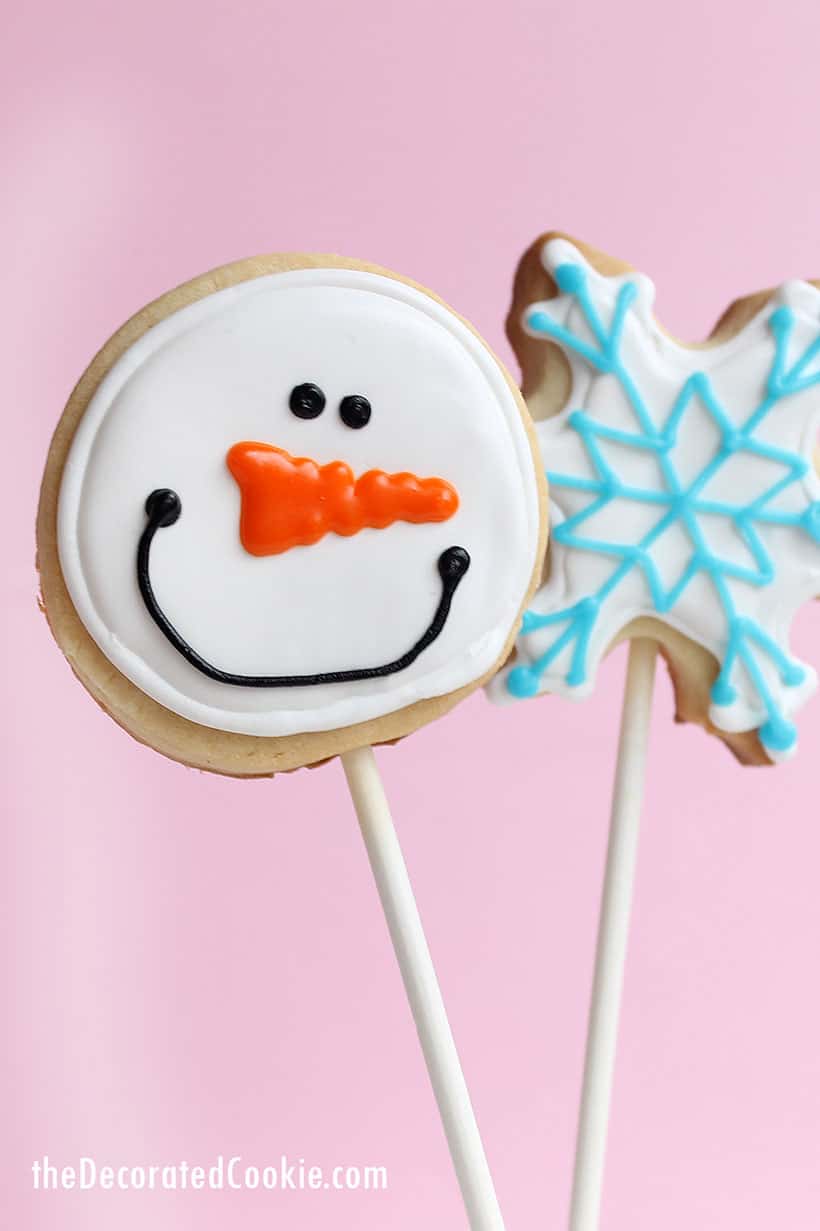
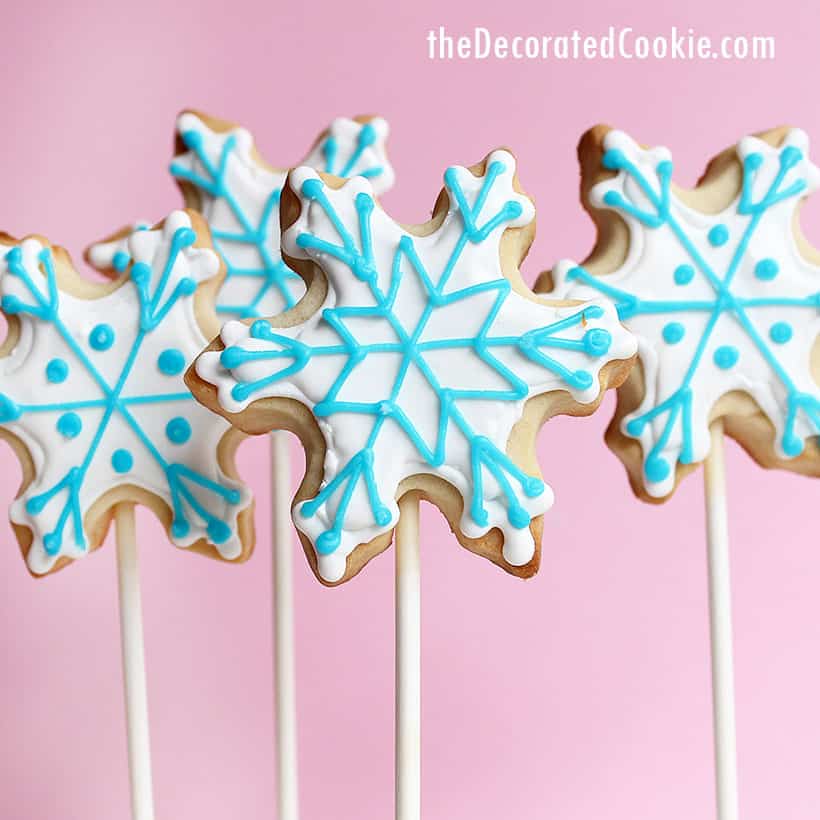
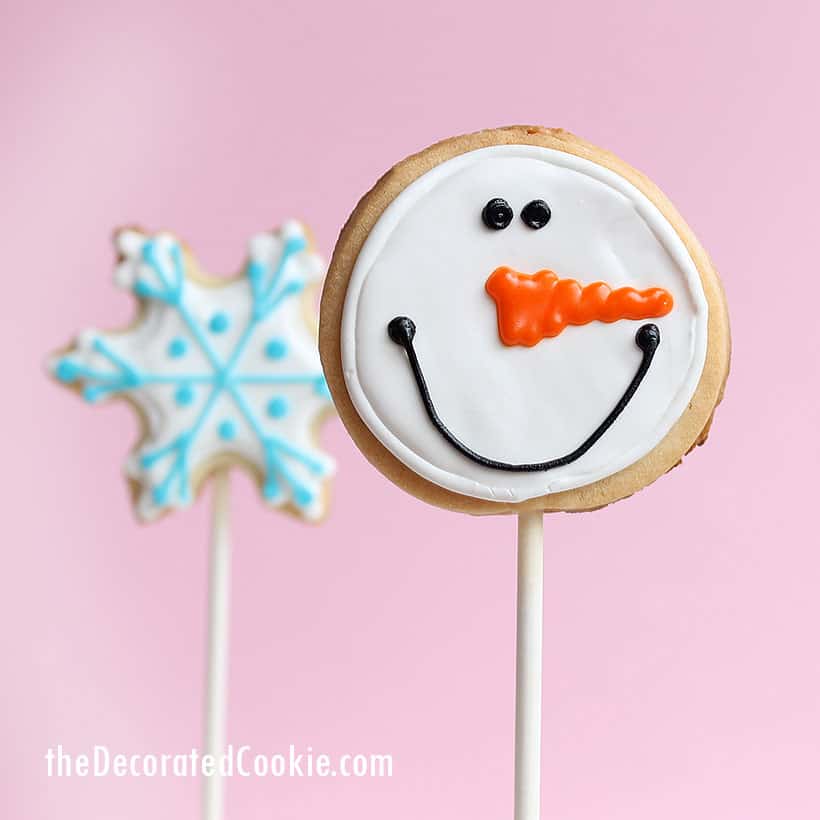
Pipe the carrots with orange icing using a size 3 tip, the face with black icing fitted with a 2 tip and the snowflake design in blue with a 2 tip.
how to decorate cookies
For basic cookie decorating how-tos, click HERE. To find cookie decorating supplies, click HERE. Let the cookies dry overnight before handling or packaging.
SUPPLIES:
Printable instructions
snowflake and snowman cookies
Fun decorated Christmas and winter cookie ideas: Snowflake and snowman cookies.
Ingredients
- Ingredients you'll need:
- My cut-out cookie dough (should make about 30 cookies)
- royal icing
- Supplies you'll need:
- 2 1/2-inch circle cookie cutter
- Snowflake cookie cutter
- Disposable decorating bags
- Decorating tips in sizes 2, 3, and 4
- couplers
- rubber bands
- Food coloring
- Lollipop sticks (optional)
Instructions
step one: prepare your cookies
Roll out the chilled cookie dough according to the recipe.
I rolled out the chilled dough, cut out 2 1/2-inch circles and snowflakes and made cookie pops. Roll out the dough about 3/8-inch and gently insert a lollipop stick.
After the cookies baked according to the recipe, cool completely..
step two: Prepare your royal icing
Prepare icing according to the recipe and divide. You'll need the most of white icing. Also prepare blue, black, and orange icing.
step three: Decorate your cookies
Assemble a decorating bag with coupler and size 3 tip, fill with icing tinted white, and pipe to outline the cookies. Let set a few minutes.
Thin icing with drops of water until the lines disappear when you overturn a spoonful. Fill an empty decorating bag, snip the tip, and pipe to fill the cookies. Let icing set 30 minutes.
Pipe the carrots with orange icing using a size 3 tip, the face with black icing fitted with a 2 tip and the snowflake design in blue with a 2 tip.
Notes
Find recipes for royal icing and cut-out cookies at theDecoratedCookie.com
Nutrition Information:
Yield:
30Serving Size:
1Amount Per Serving: Calories: 21Total Fat: 1gSaturated Fat: 0gTrans Fat: 0gUnsaturated Fat: 1gCholesterol: 0mgSodium: 12mgCarbohydrates: 3gFiber: 0gSugar: 2gProtein: 0g
Lots more snowman food ideas!
- Great gift idea: Snowman chocolate spoons.
- Here are some mini snowman and snowflake cookies.
- Easy melting snowman Oreos
- I love these cute snowman ice cream jars.
- Package snowman marshmallows and hot cocoa in a jar for a gift.

michelle says
so cute! i bet all the kiddos love you when you bring in the sweet treats! happy new year!
Dina says
they’re cute!
Stephanie Kowal says
They are cute cookies! This is such a good idea. I like this blog because they are have pictures and different kind of cookies.