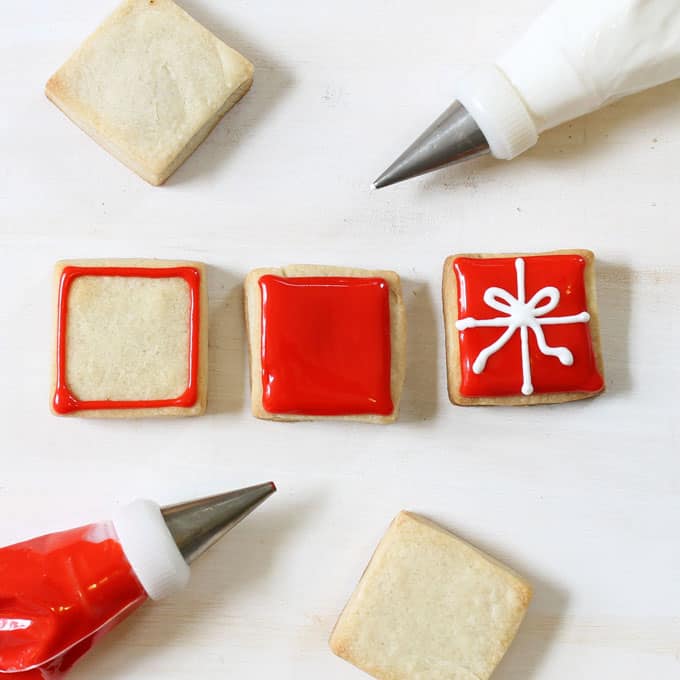
Step-by-step cookie decorating instructions to make Christmas present cookies. A simple, cute holiday cookie.

Christmas present cookies
You may not be able to tell from the photograph, but these Christmas present cookies are small. A mere 1 1/2 inches square, to be precise. And they are easy to decorate, so you can make loads and loads of them for snacking, wrapping and giving, serving on a platter at your party, hiding in your stocking for yourself… whatever. I won’t judge.
I’m all about simplifying my life of late, and these are about the simplest little Christmas cookies you can decorate. Or, skip the bow and just make dots and stripes with the white icing. Or swirls. Or plaid. Or… I’ll just let you make what you like.
more Christmas cookie ideas
- make bite-size Christmas cookies in a jar
- how about some simple Christmas wreath and tree cookies
- I love these gingerbread swirl cookies
how to make mini Christmas present cookies
- Sugar cookie dough and Royal icing
- 1 1/2-inch square cookie cutter
- White, red and green food coloring
- 5 disposable decorating bags
- 3 couplers
- 2 size “3” decorating tips
- 1 size “2” decorating tip
- Rubber bands
- Toothpicks
- Note: Use any size square cookie cutter you prefer. Shown 1 1/2 inches across. Find the cookie cutter, disposable decorating bags, coupler, and decorating tips in the craft store. For food coloring, I suggest Americolor Soft Gel Paste, Bright White, Electric Green and Red Red, available in specialty stores and online. For basic cookie decorating howtos click here.
Step 1: Roll out your cookie dough according to the recipe, about 1/4-inch thick. Cut out squares. Arrange on a baking tray lined with parchment paper and bake according to the recipe. Let cool completely.
Step 2: Prepare royal icing according to the recipe, divide and tint red, green and white. Prepare 3 decorating bags with couplers and tips. Fill two decorating bags fitted with size “4” tips with half of your red and green icings. Fill a decorating bag fitted with a size “2” tip with white icing. Close the bags tightly with rubber bands and cover the reserved red and green icing.
Step 3: Pipe a red or green outline on the cookies. Let set about 15 minutes. Thin both the red and green icings with water, a few drops at a time, stirring well, until the consistency is of thick glue. Fill two empty decorating bags with the thinned red and green icings. Close with rubber bands. Snip 1/4-inch from the tip of each bag and loosely pipe to fill the cookies with red or green icing. Let the icing flood to the outlines, encouraging as needed with a toothpick. Let set well, several hours or overnight.
Step 4: Pipe a white bow on the cookies and let dry.


Karen @ Sugartown Sweets says
Cute Sweet! I love these..my two favorite colors right now!
Rachel Kaufman says
These are so cute! I’m definitely making these for christmas
marla says
Love this! Will be linking back to this in my upcoming post 🙂
Acacia says
Totally cute! Perfect for a christmas party. How you some up with such clever cooking ideas I don’t know! But I love them.
Tiffany @ Fizzy Party says
Cute little cookies!