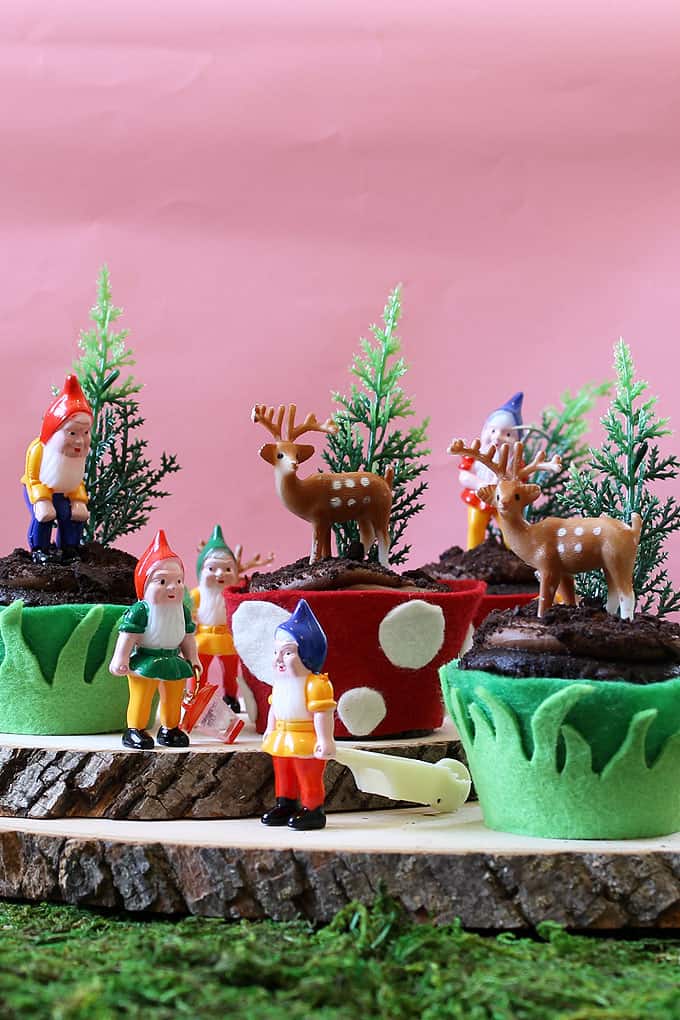
fairy woodland cupcake toppers
Like many, I have an affinity for fairy woodland gnome toadstool fawn forest type scenarios. Something about the combination is so very earthy and retro and magical. These fabric felt cupcake wrappers were inspired by the sculptable frosting figures created by my friend Cheryl at Sew Can Do. (Teaser: Cheryl will be guest posting on Thursday to show you how to make sculptable frosting cupcake toppers!!). I really need to throw a fairy party so I can make woodland cupcake toppers.
I immediately envisioned her sugar figures atop cupcakes, and I did something I don’t often do… go for fabric. Sewing and me, we don’t match seamlessly (pun totally intended, pretty good one, right?). But sewing and Cheryl, perfect together. So she inspired me in two ways today.


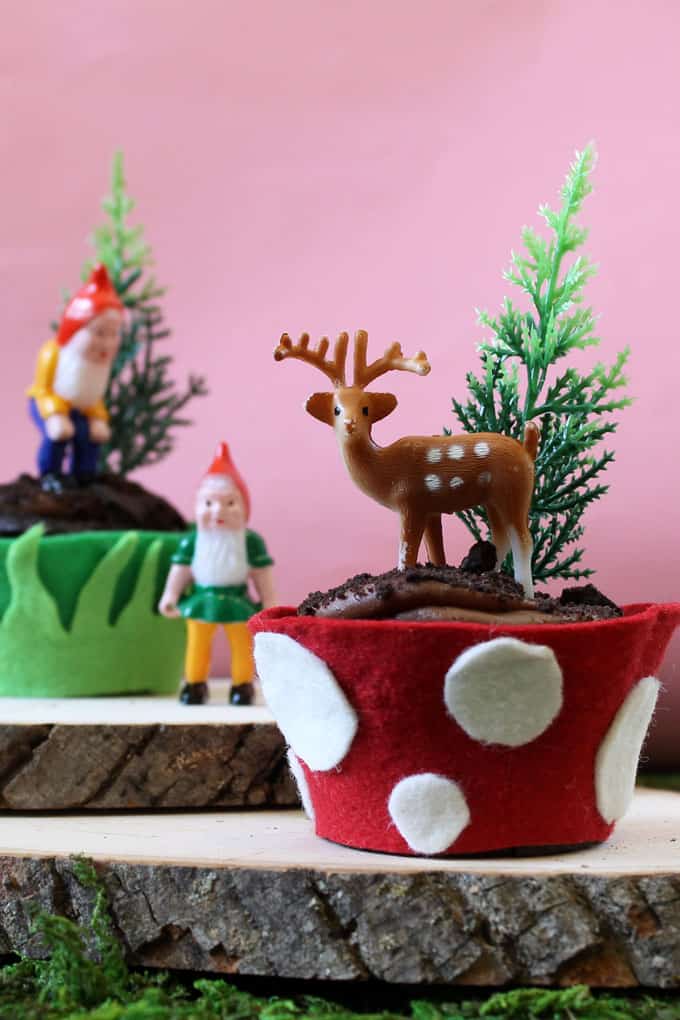
I bought these gnome, deer and evergreen tree cupcake toppers from the Layer Cake Shop. I made chocolate cupcakes, topped with chocolate buttercream and crumbled, chocolate cookies, and popped them in the wrappers.


to make woodland cupcake wrappers
you will need*
- felt (two shades of green, red and white)
- cupcake wrapper template
- paper
- sharp scissors
- glue
- cupcake toppers (or, Cheryl’s toppers)
*A good quality, sturdy felt is best for wrappers. I got mine from Wool Felt Central. Because felt can be a pain to glue, a tacky glue is best. For the cupcake wrapper template, there are plenty online (such as HERE at Skip to My Lou), or just copy the one found at the back of Sugarlicious, since I’m assuming you own Sugarlicious.

step one: cut out the felt
Print or trace the cupcake wrapper template on a piece of paper, cut out and use as a template to cut out felt. Either pin the template to the felt, or use a pencil or sewing pen to trace on the felt. For each grass wrapper, cut out one dark and one light green. For each toadstool wrapper, cut out one red.

step two: cut out the embellishments
For the grass wrappers, take one of the shades of green and cut out grass as shown. For the toadstools, cut out circles in various sizes from white felt.

step three: glue it all together
Overturn the grass felt and dab glue all over the bottom and each of the blades. Carefully layer over the other shade of green cut-out wrapper and press. Let dry. Glue the white dots on the red cut-out wrapper, and let dry. When dry, dab glue along one end of the wrapper, overlap the other end, press to seal, and let dry completely.


step four: add your cupcakes
Pop in a frosted cupcake and add your toppers. To make the edible, sculptable frosting toppers, check back on Thursday when Cheryl stops by for a visit.


Jill @ Kitchen Fun With My 3 Sons says
I never would have thought to use felt…these are super cute!
jane says
very cute…how do you keep the felt clean?
meaghanmountford says
Jane, you probably don’t for too long. Just like paper wrappers, you might only get a few uses out of them before crumbs and oil take their toll. However, I baked the cupcakes in cupcake liners. You can even put them in another liner before putting them in the felt wrappers to help contain the oils. And I piped the frosting on after they were in the wrappers to avoid going to the edge. So mine are nice and clean after one use… but I’m sure mishaps will happen!!
The Partiologist says
What a cute idea – the felt really makes it look “woodsy”. (Is that a word?) 🙂
Brenda @ SweetSimpleStuff says
The cupcake wrappers are just too cute … and you are just too creative!
Sue says
Meaghan, These are so cute and original~I love them! I just adore felt crafts!
Tiffany @ Fizzy Party says
LOVE these and your tutorial is fabulous! Too stinkin CUTE!!!!
Aussieminie says
Hi
These are GORGEOUS 🙂
Did you make the Log Platters too ???
I Love Them ♥
(From Australia)
meaghanmountford says
Thank you Aussieminie! Ah, I wish I could be so clever as that. Alas, I ordered them as a prop last year for a scene in my book. Can’t remember where. I think the craft stores here sell them, too!
Julia @ FaveCrafts says
What a cute project! I love it so much that I decided to feature it in our roundup of fairy tale-inspired crafts! Check it out here: https://www.favecraftsblog.com/fairy-tale-crafts/
Have a great day!