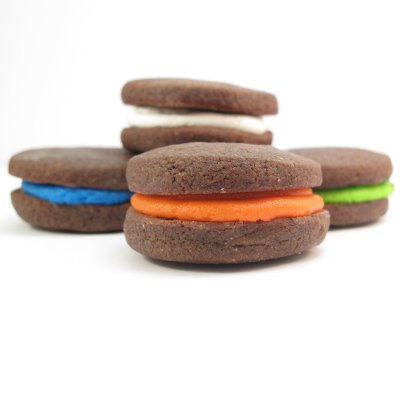
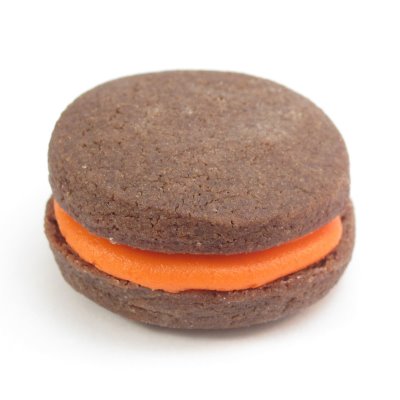
chocolate sandwich cookies
To make these delicious, colorful chocolate sandwich cookies, I used the chocolate cut-out sugar cookie recipe and the sugar cookie icing recipe from my book, which also worked really well. I made these chocolate sandwich cookies for my Dad’s birthday, and he also got these square treats.
how to make colorful chocolate sandwich cookies
you will need
chocolate cookie dough (recipe at the end of this post)
circle cookie cutter (I used a 1 1/2 inch cutter)
frosting (you can use store-bought, too)
food coloring (I used Americolor soft gel pastes, Sky Blue, Orange, Bright White and Electric Green)
1 disposable decorating bag for each color
1 coupler for each color
1 size “12” tip for each color
rubber bands
step one: bake your cookies
Roll out chilled chocolate cookie dough and cut out 1 1/2 inch circles. Bake on a parchment paper-lined baking tray according to recipe and let cool completely. TIP: Each time I had to roll out some dough, I cut out an even number of circles. That way, I could just pair up top and bottoms that were exactly the same thickness.
step two: prepare your frosting
When making frosting, make sure the consistency isn’t so thick you can’t work with it, but it should be stiff enough to keep its shape. Tint about 1/2 to 3/4 cup of frosting with each color you’d like (yes, I did actually tint the white, too). Prepare a frosting bag with size “12” tip, fill with frosting and tie closed tightly with a rubber band.
step three: assemble your chocolate sandwiche cookies
Pair up all of your cookies on the tray so each pair is of similar thickness and diameter (in case of any oven spreading). Turn one cookie from each pair over and pipe frosting to cover the entire backside of the cookie. I started with piping a circle around the outer edge and continued to pipe in a spiral to the center. Top with the other cookie, making sure the back of the cookie sits on the frosting. Hence, the bottoms of the cookies are on the inside. Let dry overnight if packaging.
RECIPE: cut-out chocolate sugar cookies
1 cup (2 sticks) slightly softened, unsalted butter
1 cup granulated sugar
1 egg
1 tsp. vanilla extract
2 cups flour
1/2 cup unsweetened cocoa powder
1/2 tsp. baking soda
1/2 tsp. salt
Cream butter and sugar. Add the egg and vanilla and blend. Mix together the dry ingredients and gradually add to the wet. Cover and refrigerate 1 to 2 hours. When chilled, roll out on a floured surface, cut out shapes, and bake on a parchment paper-lined baking tray in a preheated 375 degree oven. Bake 8 to 10 minutes for small cookies, 10 to 12 minutes for larger cookies, or until edges are crisp. TIP: In lieu of flour, which may show up on the surface, you can roll cookies between two pieces of wax paper.


Mary says
Delicious!
Justine says
I love the boldness of the colors!
Risa says
So cute, I love the bright colors!
Bethie says
I LOVE the vibrant colors.
Kat says
The colours in those cookies are gorgeous!
dessert girl says
I love the cookies! Such wonderful colors!
Jennifer says
LOVE this idea!!!! They are sooo cute!
Delectable Dining says
So cute! The colors are great!
Baking Monster says
I love making homemade oreos!
Chic Cookies says
Thanks everyone! I'm new to the sandwich cookie, but I really like these. Looks like more projects ahead…
Cakebrain says
I love the colourful frostings in the sandwich cookies! what fun!
b is for brown says
wow! love the colors! bright and festive. omgoodness! that is YOUR book. i bought it over christmas time so i could make sugar cookies for the fam. you're famous in my house!
Chic Cookies says
thank you all! yes, b is for brown, c'est moi! so glad to have found fame! and glad you enjoy the book!
jacquisbakingsomething says
My brother ( in Atlanta) sent me( Singapore) some lovely cookie cutters, I just cant wait to get started. Here in Singapore is very hot and humid. Will these cookies need to be stored airtight? for how long? How long do your frosting take to dry up before storage.Thank you for your expert advise.Love your site.Jacqui
Roberta Granada says
Hi, I love your blog, I have a blog on tb craft in general and now I'm offering my readers to download the magazine found the net, https://agulhaetricot.blogspot.com, visit me, and also appears in my online shop Maison Carré by Tita, https://maisontitacarre.blogspot.com, kiss.
Chic Cookies says
Super cute blog, Roberta! Thanks for commenting! Thank you Jacqui! Usually you can store cookies at room temperature (air tight not necessary) up to one week, and I let them dry overnight. But with the humidity, I would let them dry two days. Try and keep them in a cool spot, if you can. Humidity can make the icing soft! Good luck!
Stacy says
I was going to try to make homemade oreos for my kiddos (the little guy who is 2 LOVES and lives for his oreos), but I think I will give these a try! So much more exciting and colorful than a boring old oreo!
oneordinaryday says
I love the idea of using the different colors for the icing. So bright and cheerful!
Yvette Hooley says
These look amazing! Can't wait to give them a try. Yx
Anonymous says
So tasty! I took a cookie decorating class last week and learned that there is a kind of cocoa called black cocoa available for homemade oreos. I used it in these cookies and they look and taste like oreos, only better. I found that the dough spread a little more with this cocoa. Not sure if it is the cocoa or just that I let my butter get too soft or didn't chill my dough well enough. I'm still learning. Have you ever used black cocoa? What were your results?