how to decorate apple cookies for back to school, teacher appreciation, or fall
apple cookies
It’s teacher appreciation week, folks. That means I just made 80 little, individually-wrapped apple cookies for the staff at my daughters’ school, because when you have a blog called “the decorated cookie,” it comes with the gig.
Luckily, decorated cookies are the best gift ever. Why? They are delicious, they are personalized, and they don’t cause clutter (you know, because you eat them). Do you know any teachers who need some cookies? Well, then, here you go: How to decorate apple cookies.
more back to school cookies
If you like these cookies, you might also like these pencil cookies with free printable or these superstar cookies.
video how-tos
A few notes on these:
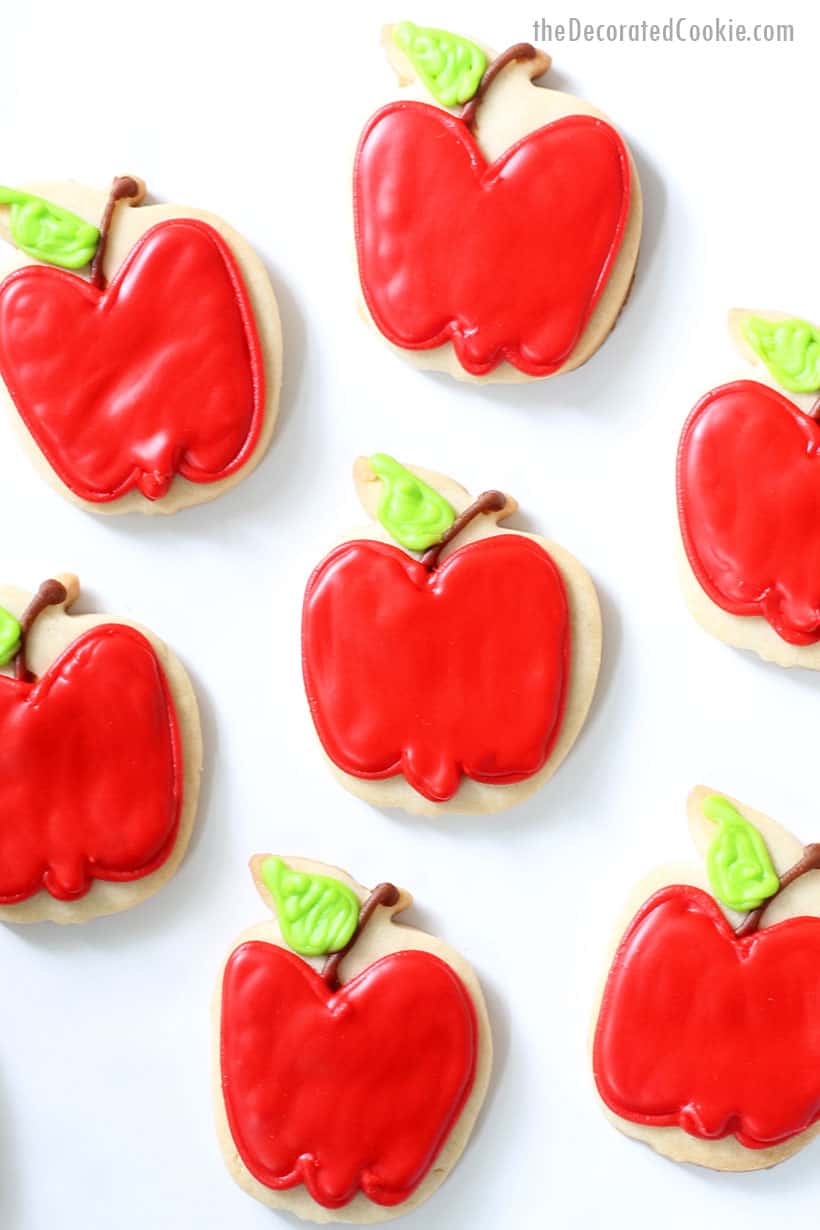
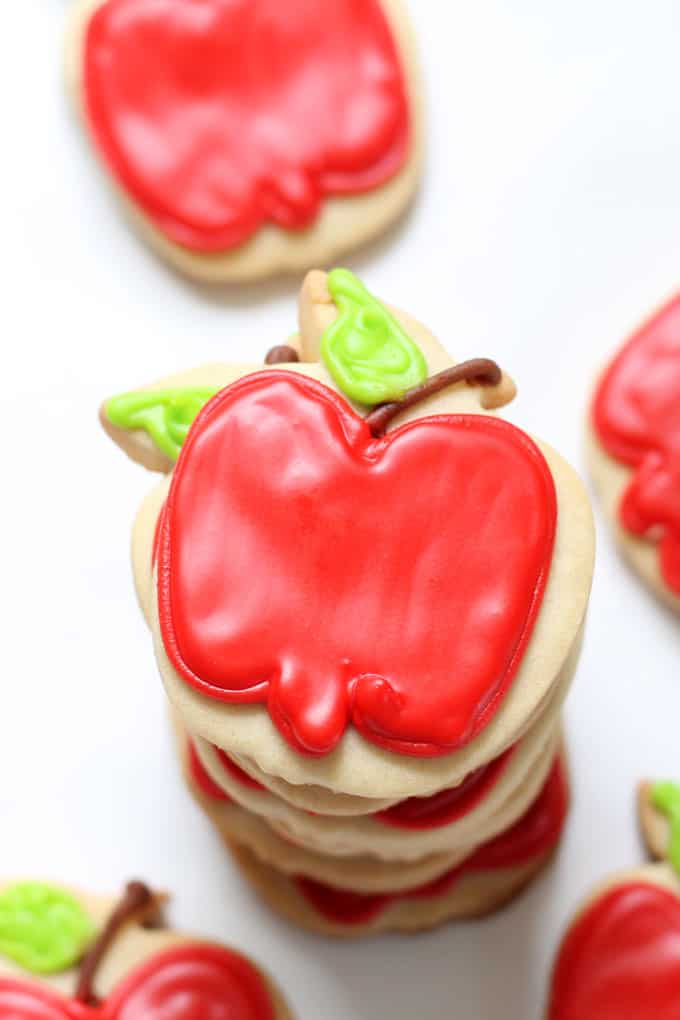
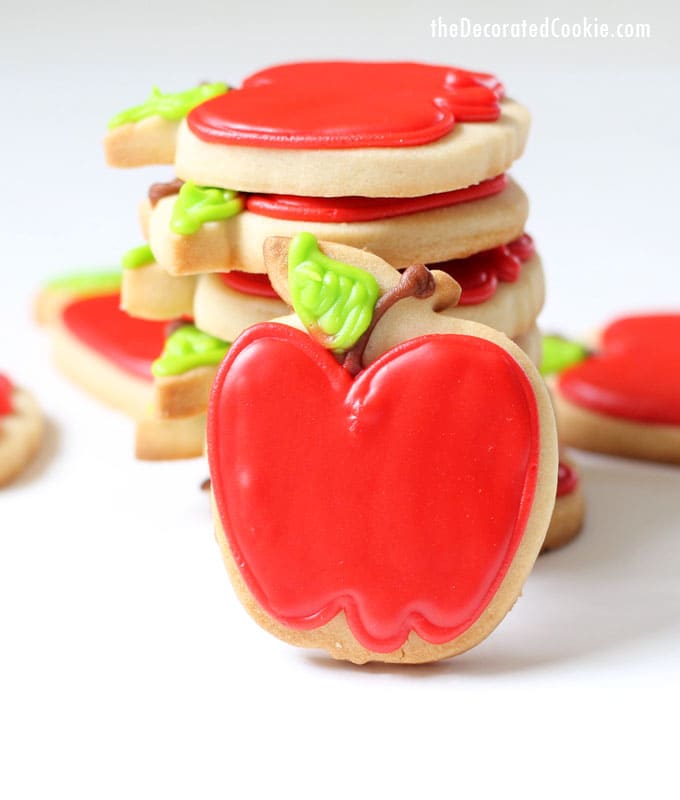
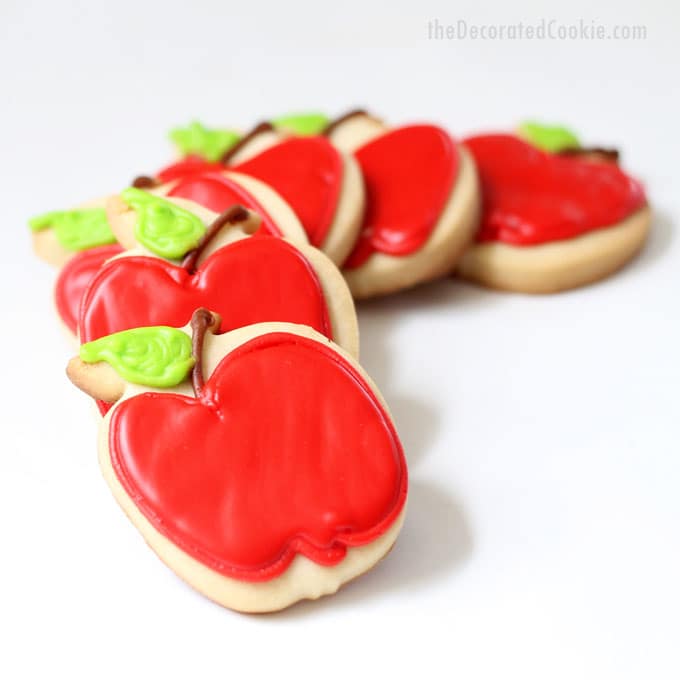
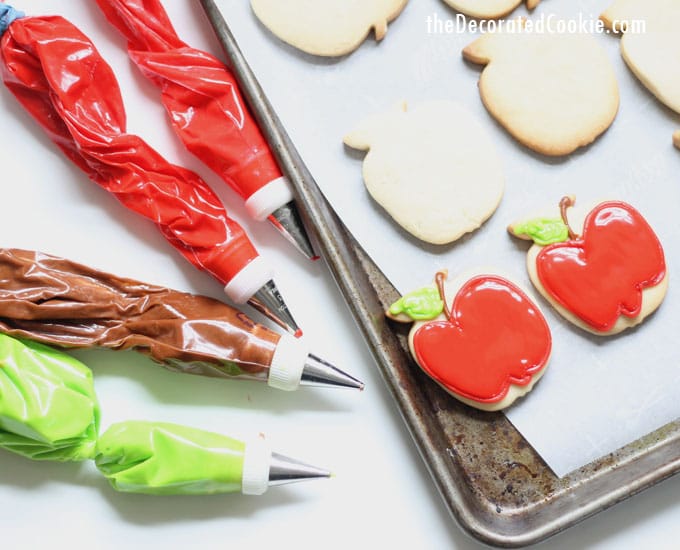
- I used a small apple cutter, about 2 1/2-inches across. To make 80 apples, I made three batches of my cut-out cookie dough.
- I used one entire batch of my royal icing to decorate 80 cookies.
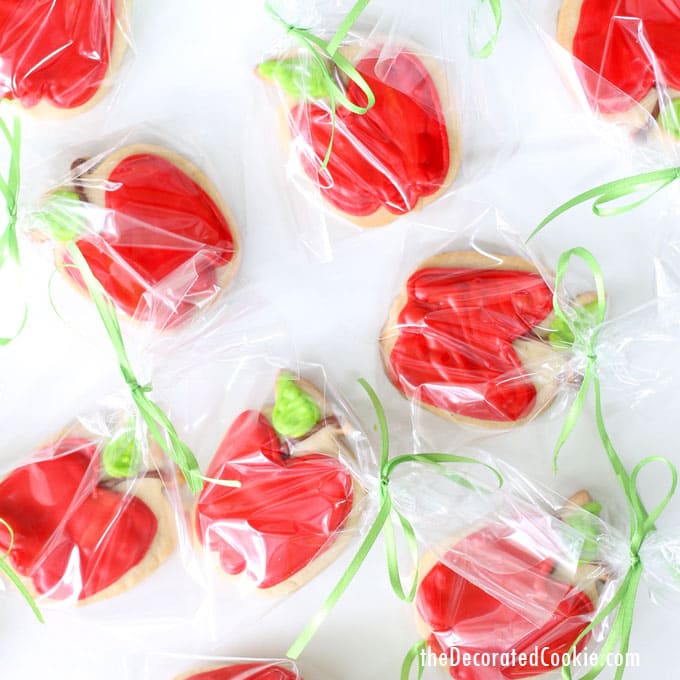
- Make sure the cookies set at room temperature (if you’re in a humid climate, run a fan in the room) overnight before packaging. I used little cellophane bags with ribbon.
- If you freeze the dried, decorated cookies, do so in freezer Ziplocs and let the cookies thaw completely at room temperature before opening the Ziplocs.
- For basic cookie decorating how-tos, click HERE.
- For more cookie decorating recipes, click here. (By the way, if you need vegan cookies and icing recipes, click HERE.)
how to decorate apple cookies
you will need:*
- cut-out cookie dough
- apple cutter
- royal icing
- food coloring
- disposable decorating bags
- couplers
- tips, sizes 3 and sizes 4
- rubber bands
* Find most of the above at the craft store, or click the affiliate links. For tips on finding cookie decorating supplies, click here. For food coloring, I suggest Americolor Soft Gel Pastes, available in specialty stores and online. Red Red, Chocolate Brown, and Electric Green used here.
what to do:
Prepare the cookie dough and royal icing according to the recipes. Chill the cookie dough, roll out, cut out the apples, bake and let cool.
Divide the icing (you’ll need the most of red, of course) and make red, brown, and green. Divide the red icing. Thin two-thirds of the red icing with drops of water until it’s a good flooding consistency (that is, just to the point where the icing folds into itself when overturned). Prepare decorating bags with couplers and tips, fill with the icing, and close tightly with rubber bands. Use size 3 and 4 tips, whatever your preference. (I used size 4 for green, size 3 for brown, size 3 for both of the reds.)
Pipe the stem. Pipe the outline of the apple with the thicker red. Pipe and fill the leaf with green. When the outline sets (about ten minutes), pipe to fill with the thinned red icing.
Let set overnight before packaging and handling.
apple cookies

Fun and easy back to school or fall decorated cookies: Apple cookies
Ingredients
- cut-out cookie dough
- apple cutter
- royal icing
- food coloring
- disposable decorating bags
- couplers
- tips, sizes 3 and sizes 4
- rubber bands
Instructions
Prepare the cookie dough and royal icing according to the recipes. Chill the cookie dough, roll out, cut out the apples, bake and let cool.
Divide the icing (you'll need the most of red, of course) and make red, brown, and green. Divide the red icing. Thin two-thirds of the red icing with drops of water until it's a good flooding consistency (that is, just to the point where the icing folds into itself when overturned). Prepare decorating bags with couplers and tips, fill with the icing, and close tightly with rubber bands. Use size 3 and 4 tips, whatever your preference. (I used size 4 for green, size 3 for brown, size 3 for both of the reds.)
Pipe the stem. Pipe the outline of the apple with the thicker red. Pipe and fill the leaf with green. When the outline sets (about ten minutes), pipe to fill with the thinned red icing.
Let set overnight before packaging and handling.
Nutrition Information:
Yield:
24Serving Size:
1Amount Per Serving: Calories: 17Total Fat: 1gSaturated Fat: 0gTrans Fat: 0gUnsaturated Fat: 0gCholesterol: 0mgSodium: 8mgCarbohydrates: 3gFiber: 0gSugar: 2gProtein: 0g
All wrapped up and ready to go!


NL says
Sorry that decorating needs some work on those apples. I can give you a few tips. You’re icing was to thick that is why it never covered your border and is all wavey. If you use a thinner icing you can eliminate the border and do the 2 steps in one. Your icing should be SMOOTH not lumpy like that. Thin the icing to about a 12 second consitency and all that will disappear. If not – thin more
meaghanmountford says
Um… wow. If you’ve read my two cookbooks or have been following my 11 year old blog or knew me for the ten years I worked as a professional cookie decorator before that, you would actually know that I PREFER much thicker icing. Lumps, less smooth, seeing the lines, imperfection. I don’t care. I prefer thicker icing and I would never do a thinner consistency (maybe, on occasion, a 10-second icing). Why? Too thin icing can cause many more problems. It can create a longer drying time and complicate handling, shipping, and packaging. It can also create air bubbles and discoloration from uneven evaporation. I promise I already know all these things you mentioned (and discuss flooding at length in my 2nd cookbook). I give up perfection for the sake of a much more user-friendly (and better-tasting), thicker icing.